18 Genius Budget Camper Organization Ideas for a Clutter-Free Road Trip
The allure of the open road is undeniable, but the reality of living in a compact space can quickly turn the dream into a cluttered nightmare. If your campervan feels more like a chaotic closet on wheels than a serene mobile retreat, you're not alone. The key to harmonious van life isn't a bigger vehicle; it's smarter, more efficient organization. Forget expensive custom cabinetry and professional retrofits; true freedom on the road comes from ingenious, budget-friendly solutions that maximize every square inch.
As an investigator of practical solutions for modern living, I've delved into the world of mobile habitats to uncover the most effective strategies for taming clutter. This guide is your roadmap to a perfectly organized camper, using everyday items and a bit of creativity. We'll explore how to reclaim wasted space, secure your belongings for travel, and create systems that make finding what you need effortless. Get ready to transform your vehicle into a functional, peaceful haven that's always ready for the next adventure.
1. Embrace Verticality with Hanging Shoe Organizers
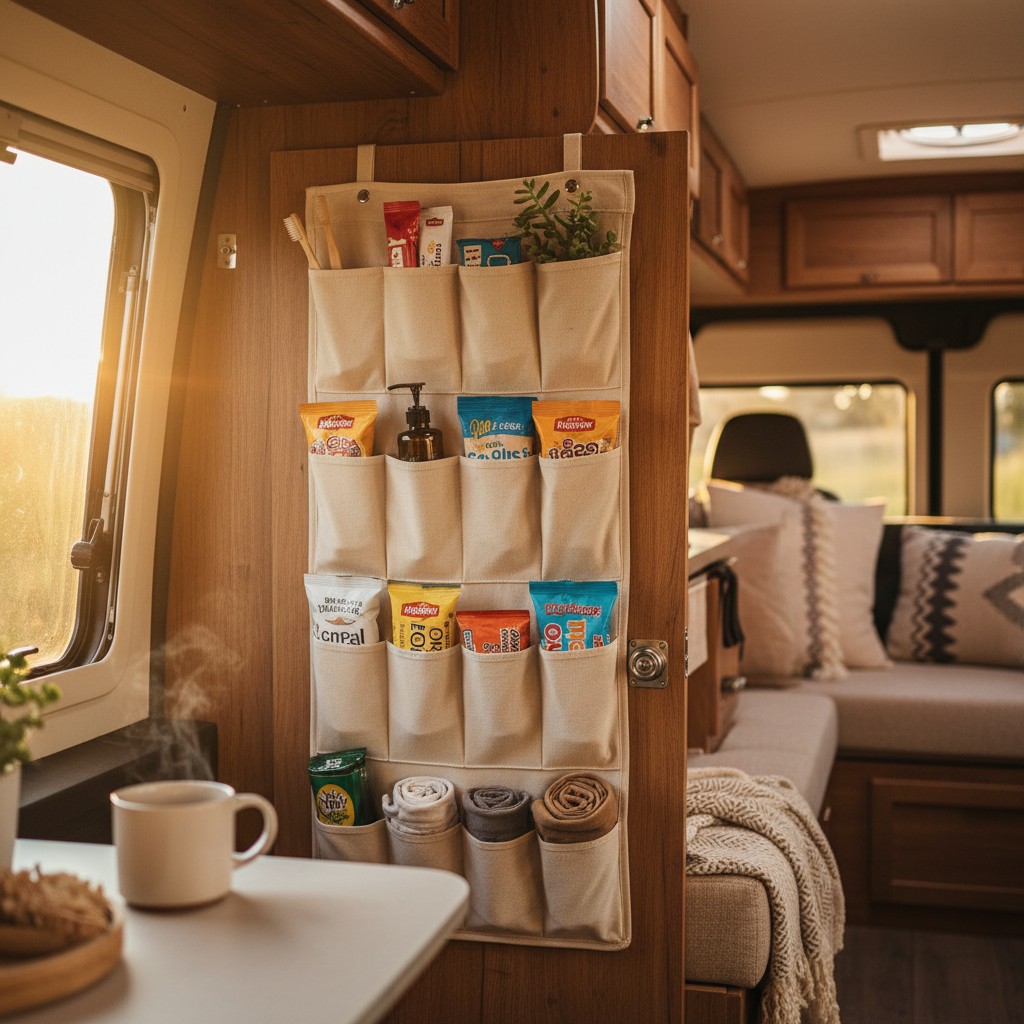
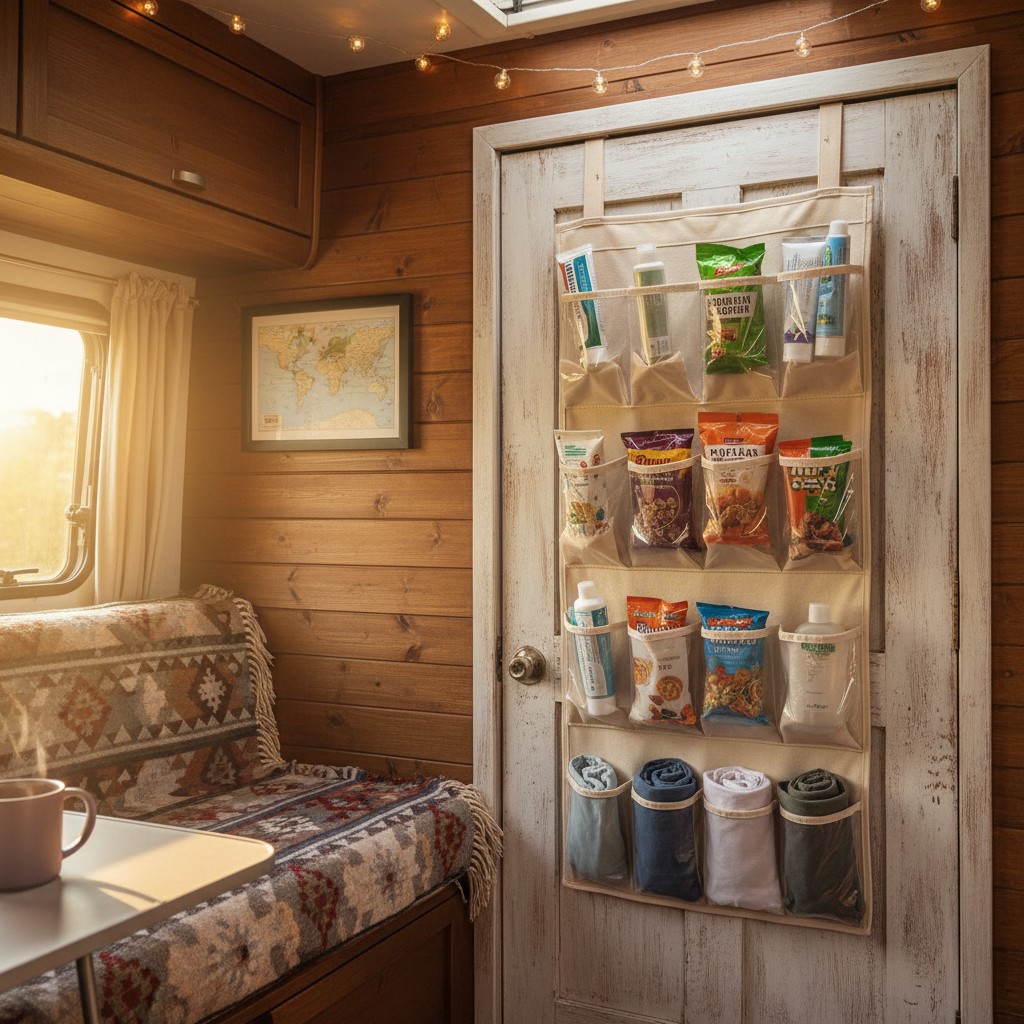
In a camper, floor space is gold. The most common mistake beginners make is thinking horizontally, cluttering benches and floors. The professional solution is to think vertically. Walls and doors are vast, untapped real estate for storage. An over-the-door shoe organizer is perhaps the most versatile and affordable tool in your arsenal for conquering this space. Their multiple pockets are perfect for a wide range of items, from shoes and socks to toiletries, cleaning supplies, and kitchen utensils.
To implement this, simply purchase a clear or fabric shoe organizer. The clear plastic variety allows you to see contents at a glance, saving you precious time. Hang it on the back of your bathroom door, a closet door, or even affix a section of it to an open wall with sturdy hooks or screws. For a no-drill solution, heavy-duty Command hooks can often hold a significant amount of weight, perfect for lighter items like spices, charging cables, and socks.
Beyond shoes, categorize your pockets. Designate a few for bathroom essentials like toothbrushes and travel-sized shampoos. Use others in the kitchen area for spice packets, cutlery, and small snacks. This system not only frees up your limited drawer and cabinet space but also creates a predictable 'home' for small items that are easily lost, making your daily routine on the road significantly smoother.
2. Harness the Power of Magnetism
Rattling drawers are the soundtrack to a poorly organized camper. Metal objects, in particular, can create a racket and become a jumbled mess while you drive. The solution is elegant and surprisingly affordable: magnets. Magnetic strips, originally designed for kitchen knives, are a van lifer's best friend. They provide secure, visible, and easily accessible storage for any ferrous metal item, keeping your countertops clear and your drawers quiet.
Installation is straightforward. Mount a magnetic knife strip on a kitchen backsplash wall to hold your knives, scissors, and other metal utensils. But don't stop there. You can purchase small, powerful neodymium magnets with adhesive backing to stick onto the bottom of spice containers, turning any metal surface (like the side of your fridge or a metal splashback) into a vertical spice rack. This trick keeps your spices from toppling over in a cabinet and makes them easy to grab while cooking.
For an advanced tip, consider using magnetic hooks on metal surfaces for hanging keys, pot holders, or lightweight pans. You can also place a magnetic bar inside a cabinet door to organize small metal items like tweezers, nail clippers, and bobby pins. This strategy is a cornerstone of efficient small-space living, reflecting the broader lifestyle trends that favor minimalism and multi-functional design.
3. Master the Bungee Cord Web
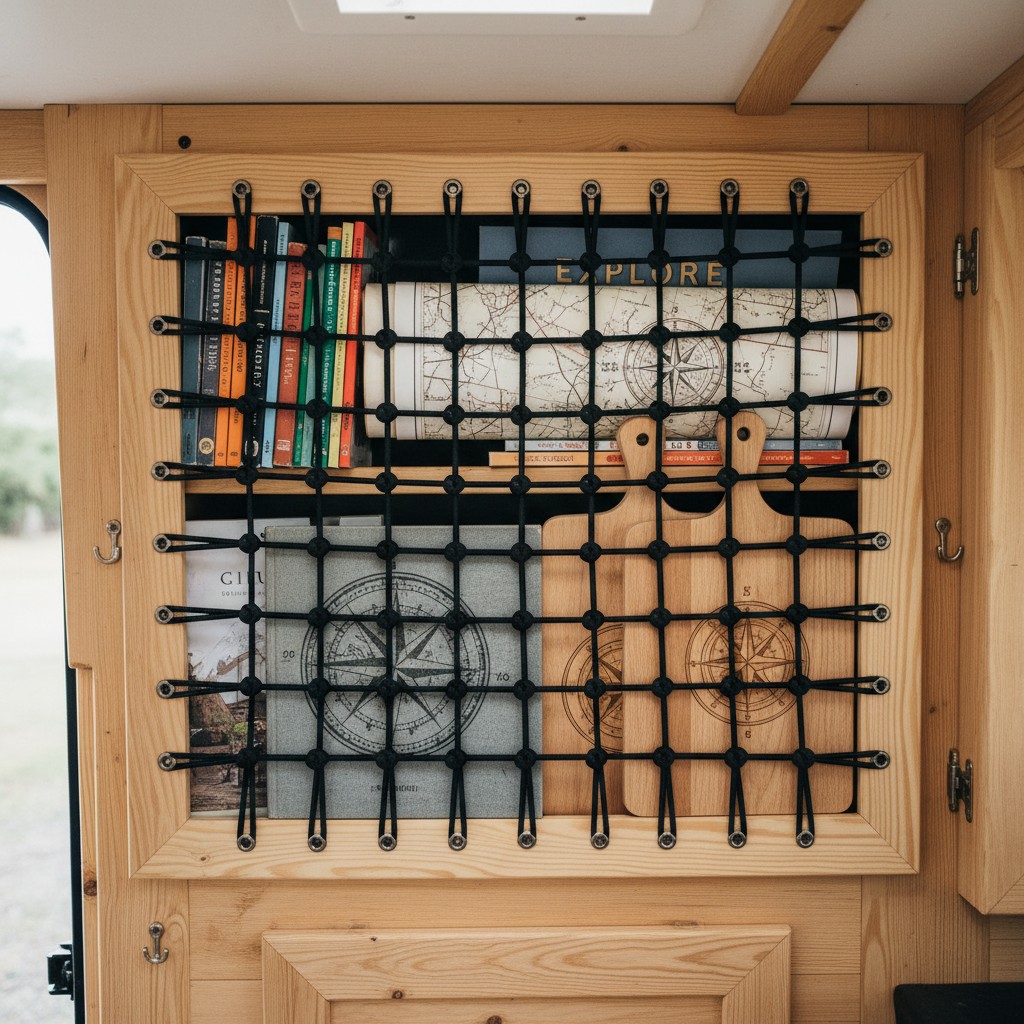
Sometimes the best organization tools are the simplest. Bungee cords are inexpensive, versatile, and perfect for securing awkwardly shaped items that don't fit neatly into bins. A fantastic DIY hack is to create a 'storage web' on any flat, recessed surface, such as the inside of a cabinet door or an open wall cavity. This creates a flexible holding area for flat items like cutting boards, books, maps, or even a laptop.
To create your web, install a series of small cup hooks or screw eyes around the perimeter of the area you want to use. You can then stretch bungee cords of various lengths between these hooks in a crisscross pattern. The tension will hold items securely against the wall, preventing them from sliding around or falling out when you open the cabinet after a bumpy ride. You can customize the tension and pattern based on the items you need to store.
This method is especially useful in the kitchen for cutting boards and serving trays, which are notoriously difficult to store. It can also be used above the driver's cab to hold sun visors, documents, or light jackets. The beauty of the bungee web is its adaptability; you can easily change the configuration to accommodate different items as your needs evolve on the road.
4. Install Tension Rods Everywhere
Tension rods are a renter's secret weapon, and they are equally brilliant for camper organization because they require no drilling. These adjustable, spring-loaded rods can be fitted into almost any space to create instant storage solutions. Their most common use in a camper is inside cabinets and the refrigerator to act as a barrier, preventing items from shifting and falling during transit.
In your food cabinet, place a tension rod a few inches from the front edge of a shelf. This simple rail will stop cans, jars, and boxes from toppling out when you open the door after arriving at your campsite. Use them vertically inside a deep cabinet to create dividers for baking sheets, platters, or chopping boards. In the closet, an extra tension rod can double your hanging space for shirts or can be used with S-hooks to hang accessories like scarves and belts.
One of the most effective uses is inside the camper fridge. A small tension rod placed across a shelf will keep bottles, yogurts, and jars securely in place. You can also use them in the bathroom cabinet to hold rolls of toilet paper or under the sink to hang spray bottles by their triggers, freeing up the entire cabinet floor for other items. They are cheap, removable, and incredibly effective.
5. Utilize Collapsible Containers
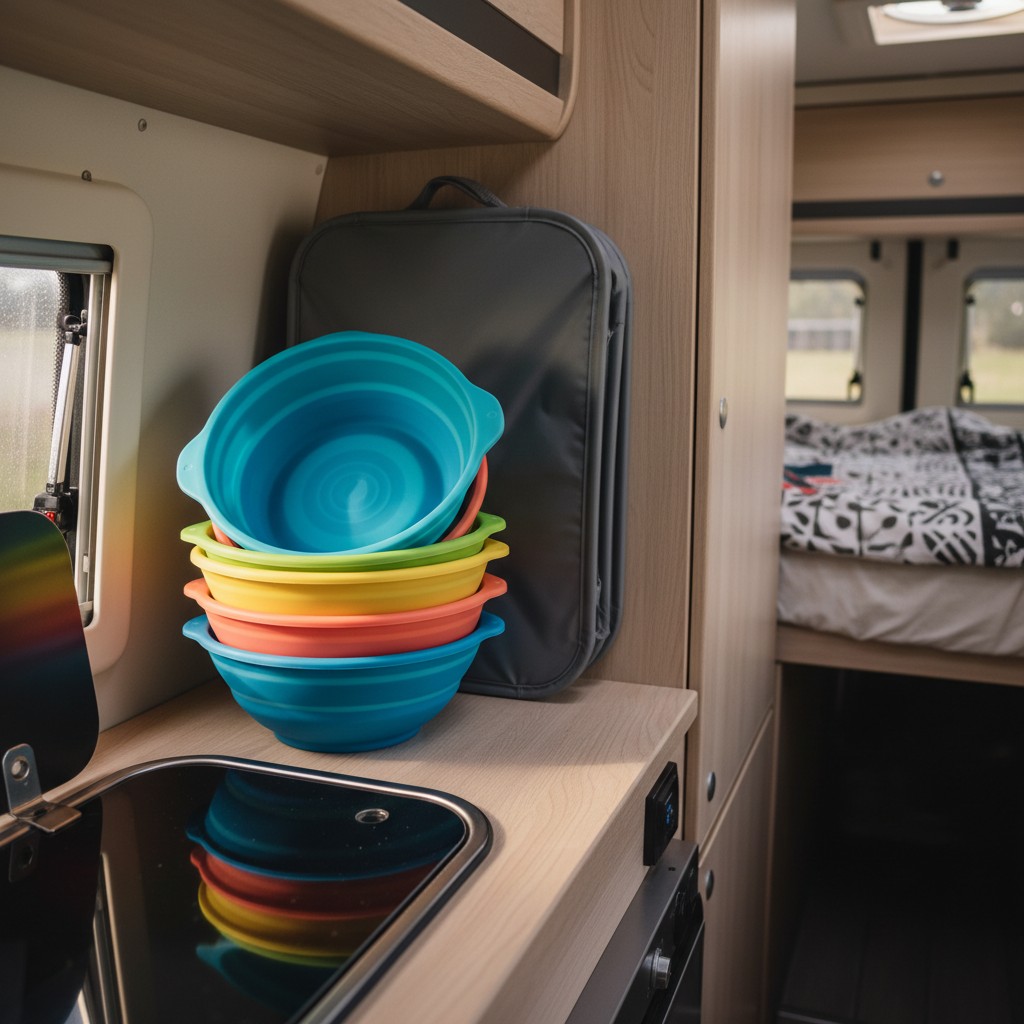
In a tiny home on wheels, an item's footprint when not in use is just as important as its function when it is. Bulky items like laundry baskets, mixing bowls, and dish drainers can consume a shocking amount of precious cabinet space. The solution is to invest in collapsible versions of these everyday necessities. Made from flexible silicone or clever folding plastic, these items perform their duties perfectly and then flatten to a fraction of their size for storage.
Start in the kitchen. A set of collapsible silicone food storage containers, measuring cups, and a colander can replace their rigid counterparts, nesting together and taking up minimal drawer space. A collapsible dish drainer is another game-changer, allowing you to dry dishes effectively before stowing it away completely. Look for a collapsible bucket for cleaning or carrying water, and a large collapsible laundry basket that can be tucked into the narrow space beside a bed or in a shallow closet.
This principle extends beyond the kitchen. Many outdoor gear companies now offer collapsible water bottles and coffee cups, which are perfect for day hikes. By systematically replacing bulky, single-form items with their collapsible cousins, you can reclaim huge amounts of storage space. This is a key strategy for anyone serious about long-term, comfortable van life.
6. Think Inside the Box with DIY Dividers
Drawers in a camper can quickly become 'junk drawers'—a chaotic jumble of unrelated items. Commercial drawer dividers are often expensive and rarely fit the non-standard dimensions of camper furniture. The ultimate budget solution is to create your own custom dividers using nothing more than sturdy cardboard and a utility knife. This allows you to create perfectly sized compartments for everything from cutlery and utensils to socks and underwear.
Find a sturdy cardboard box—appliance boxes are ideal. Measure the interior height, width, and depth of your drawer. Cut long strips of cardboard to match the height and length/width. To create an interlocking grid, cut slits halfway through the cardboard strips at your desired intervals. For example, on your length-wise strips, cut slits from the top down to the middle. On your width-wise strips, cut slits from the bottom up to the middle. You can then slide the strips together to form a stable grid.
This method is infinitely customizable. You can create small squares for batteries and charging cables, long rectangles for cooking spoons, and medium-sized sections for socks. For a more polished look, you can wrap the cardboard in contact paper or fabric before assembling. It’s a virtually free project that brings an incredible amount of order to your most chaotic spaces, making life on the road far less frustrating.
7. Leverage the Power of the Pegboard
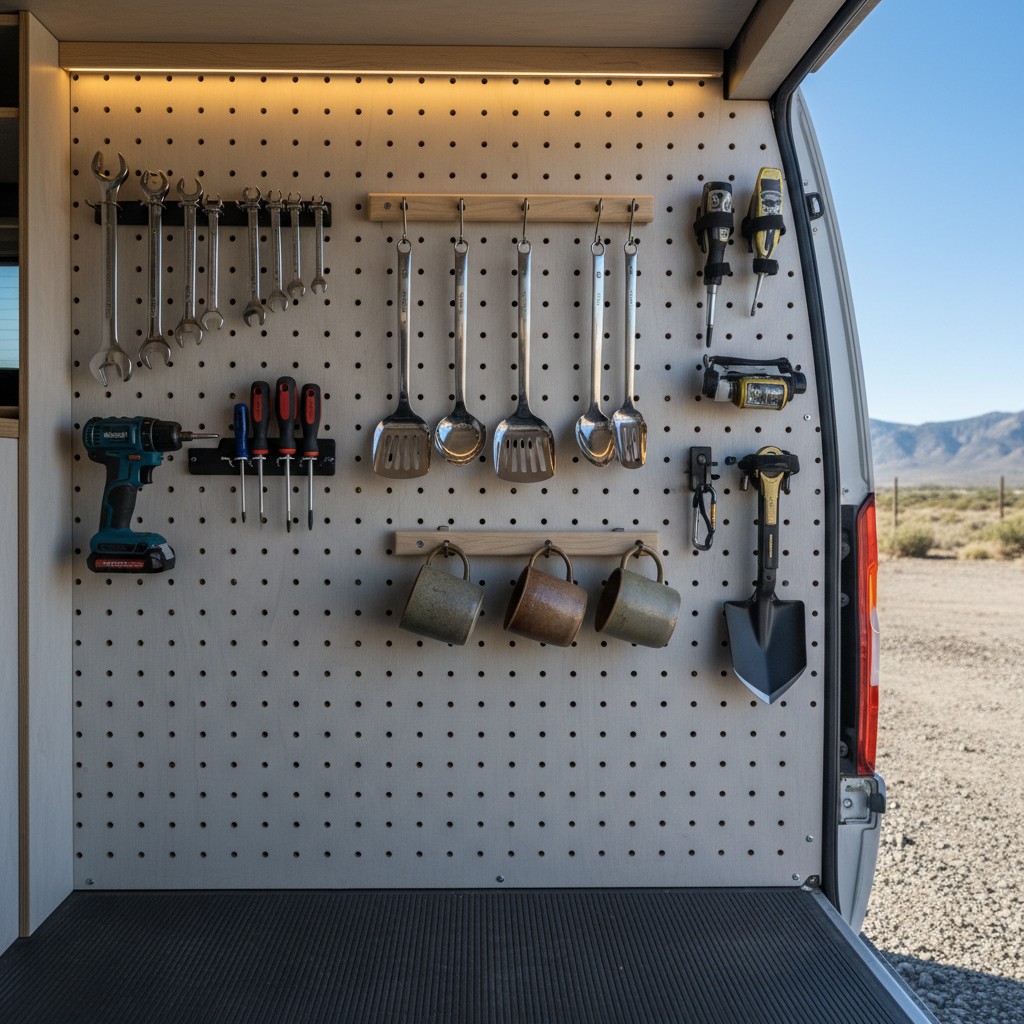
A pegboard is a modular organization powerhouse, and it's perfect for a camper. By mounting a sheet of pegboard to a wall, you create a fully customizable storage surface that can adapt to your changing needs. It's ideal for the 'garage' area of your van for tools and outdoor gear, or even in the kitchen for pots, pans, and utensils. The grid of holes allows you to place hooks, shelves, and baskets exactly where you need them.
To install, you'll need to mount the pegboard on furring strips or spacers. This creates a small gap between the board and the van wall, which is necessary for the hooks to be inserted properly. Secure the board firmly to the van's structural ribs for stability. Once mounted, the fun begins. Arrange a variety of pegboard accessories to hold your gear. Use heavy-duty hooks for pans, small baskets for spices, and specialized holders for tools like screwdrivers and wrenches.
The beauty of the pegboard system is its visibility and accessibility. Everything has a designated spot and is out in the open, so you can grab what you need without digging through a bin. This system is also incredibly secure for travel; the snug fit of the hooks prevents most items from rattling or falling off. It's a one-time, low-cost installation that provides endless organizational possibilities.
8. Look Up: Ceiling Cargo Nets
The ceiling is arguably the most underutilized surface in any camper. By installing a cargo net, you can create a 'storage loft' for bulky but lightweight items. This is the perfect spot for extra bedding, puffy jackets, towels, or even bags of chips and bread that you don't want to get crushed. It keeps these items out of the way but still easily accessible.
You can purchase ready-made ceiling cargo nets designed for vehicles, or you can easily make your own. All you need is a durable net and a series of anchor points. Small D-rings or footman loops screwed securely into the ceiling's structural supports work perfectly. Stretch the net between these anchor points, ensuring it's taut enough to support your items without sagging too much.
The best place for a ceiling net is typically over the bed or in the rear of the van. In the sleeping area, it can hold your pillows and blankets during the day, clearing your bed so it can be used as a lounge space. This simple, inexpensive addition can free up an entire cabinet's worth of space, making it one of the most impactful budget organization hacks you can implement.
9. Stick It with Command Hooks
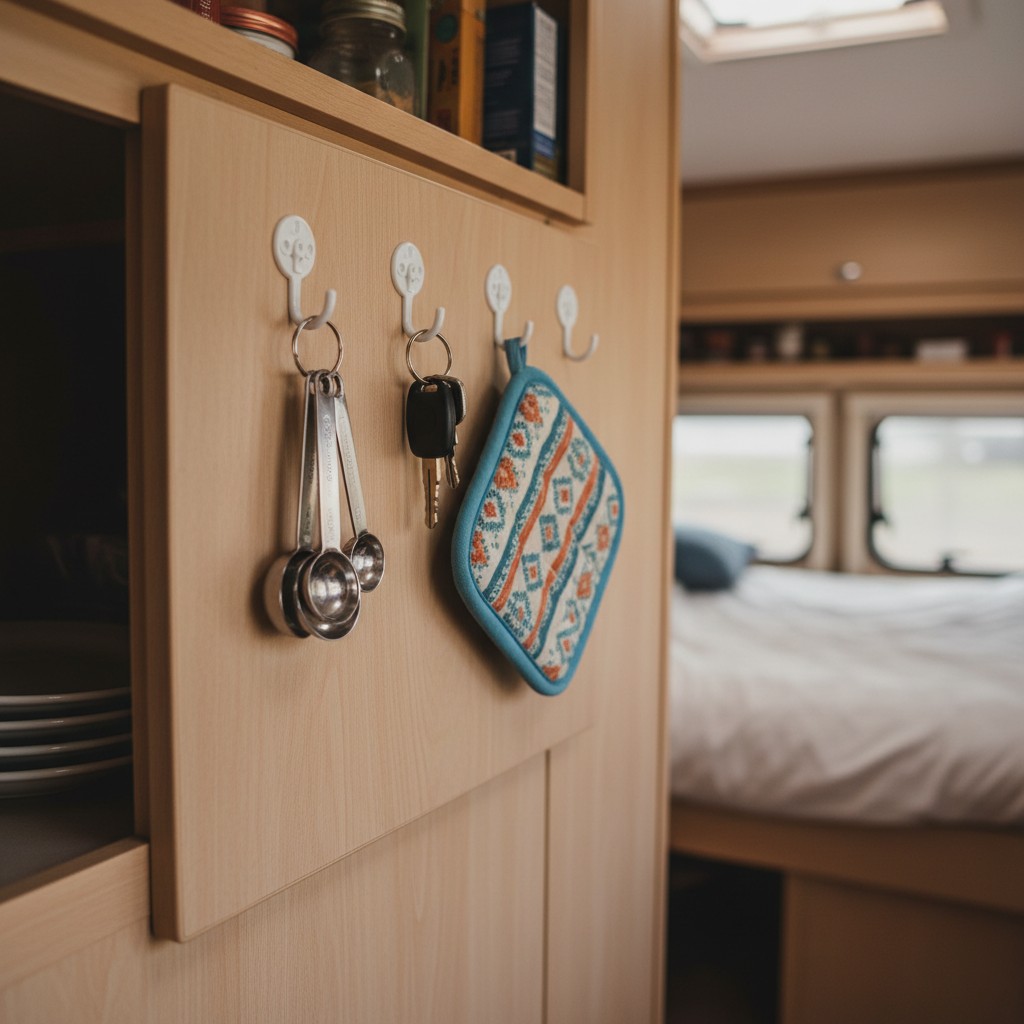
For those hesitant to drill into their beloved camper, Command hooks are the ultimate damage-free solution. These adhesive hooks come in a huge variety of sizes and weight capacities, and they stick securely to most smooth surfaces like wood, plastic, and metal. When it's time for a change, they can be removed cleanly without leaving any residue or holes.
Their uses are nearly limitless. Use small hooks inside cabinet doors to hang measuring spoons, pot holders, or keys. Place a few by the main door to act as a key rack. In the bathroom, use water-resistant versions to hang towels, washcloths, and squeegees. You can even use the heavier-duty hooks to hang small pans, dustpans, or jackets on an open wall.
Get creative with their application. Use Command's picture-hanging strips to mount a lightweight whiteboard or corkboard for notes and reminders. Use their cord-bundlers to tame the mess of charging cables around your power outlets. A small investment in a variety pack of Command products can solve dozens of minor organizational annoyances, bringing a sense of calm and order to your small space.
10. Repurpose Old Wooden Crates
For a touch of rustic charm that is both functional and incredibly cheap, look no further than old wooden crates. Wine crates, apple crates, or small pallets can be found for free or very cheap at wineries, grocery stores, or online marketplaces. With a little sanding and a coat of paint or sealant, they can be transformed into beautiful, modular storage units.
You can stack and secure several crates together to create a custom shelving unit that fits perfectly into an unused nook. Screw them together for stability and then secure the entire unit to the wall or floor of the van. Lay a crate on its side to create a small bookshelf or a shoe cubby near the door. Stand one on its end and it becomes a perfect holder for umbrellas or hiking poles.
For a more integrated look, you can mount a single crate directly to a wall to act as a floating shelf or nightstand. The inherent sturdiness of these crates makes them ideal for holding heavier items. This approach not only provides excellent storage but also adds character and warmth to your camper's interior, making it feel more like a home.
11. Vacuum Seal Bags for Soft Goods
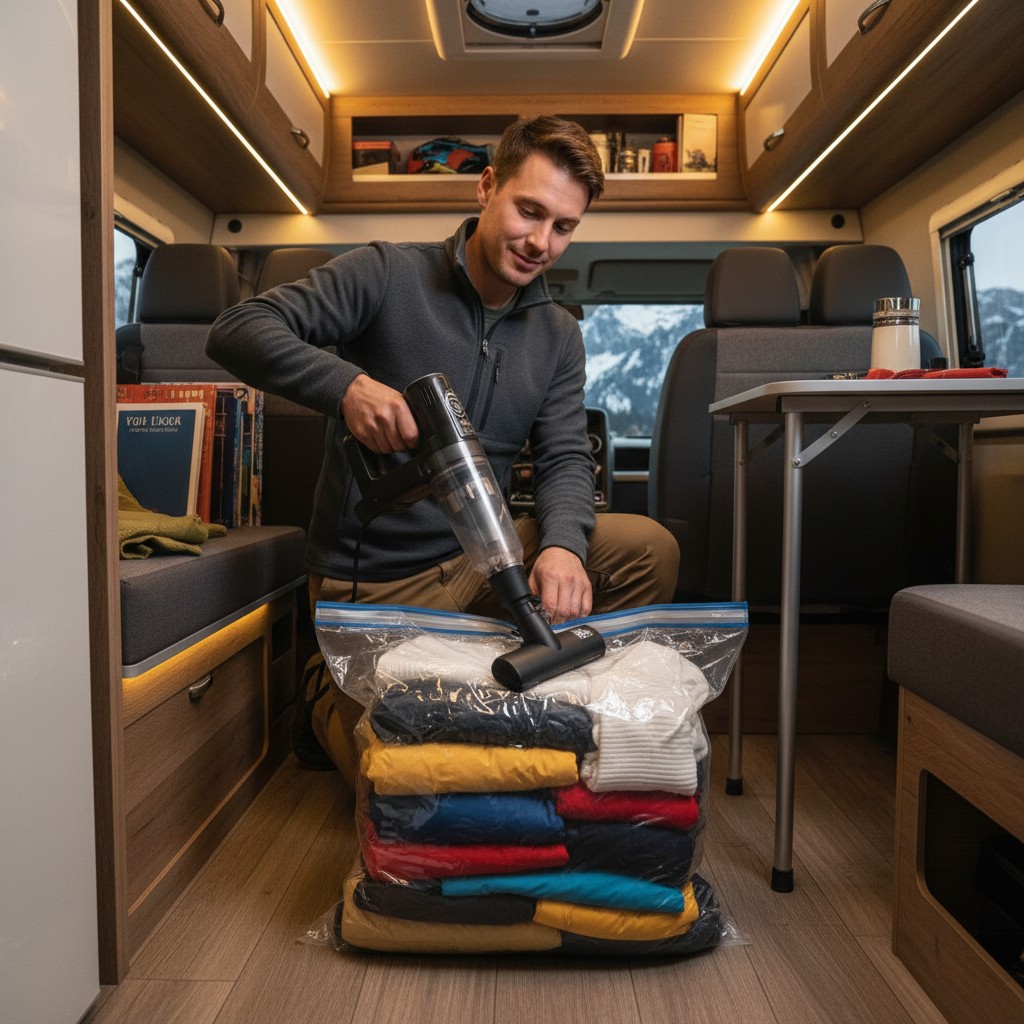
Clothing, towels, and bedding are space hogs. A change of seasons or preparing for different climates can mean packing bulky sweaters, jackets, and extra blankets that consume entire cabinets. Vacuum seal bags are the solution. These plastic bags allow you to compress soft goods by removing all the air, reducing their volume by as much as 80%.
This is particularly useful for seasonal items. When summer hits, pack away your winter fleeces, thermal underwear, and heavy blankets into a few vacuum bags. Once compressed, these items become dense, flat packages that can be easily slid under a bed, at the back of a deep cabinet, or in an overhead compartment. You'll need a vacuum to suck the air out, but many companies now make small, 12V-powered or hand-pump versions perfect for van life.
Beyond seasonal storage, these bags are also great for managing laundry. Keep an empty vacuum bag for dirty clothes. As it fills up, you can compress it down, which not only saves space but also contains any odors until you can get to a laundromat. This simple technology is one of the most effective ways to manage the large volume of textiles required for comfortable travel.
12. Decant Everything into Uniform Containers
Commercial food packaging is a space-wasting disaster. Cereal boxes are half-full of air, bags of rice and pasta are floppy and unstackable, and spice jars come in a dozen different shapes and sizes. To create a truly efficient pantry, the key is to decant everything into uniform, space-saving containers. This allows for neat stacking and eliminates the awkward, wasted air space that comes with original packaging.
Invest in a set of clear, square, or rectangular food storage containers. The square shape is crucial as it leaves no wasted space between containers, unlike round ones. Opt for containers that are designed to stack securely. Transfer your dry goods—flour, sugar, pasta, rice, cereal, nuts—into these containers as soon as you buy them. Use a label maker or a simple marker on masking tape to clearly identify the contents and any cooking instructions or expiration dates.
This system has multiple benefits beyond just saving space. It keeps your food fresher for longer and protects it from pests. The clear containers let you see at a glance when you're running low on something, making grocery lists easier to compile. While the initial investment in containers might seem like a splurge, the long-term gains in space, organization, and food preservation are well worth it for any serious camper.
13. Create a 'Go-Bag' System
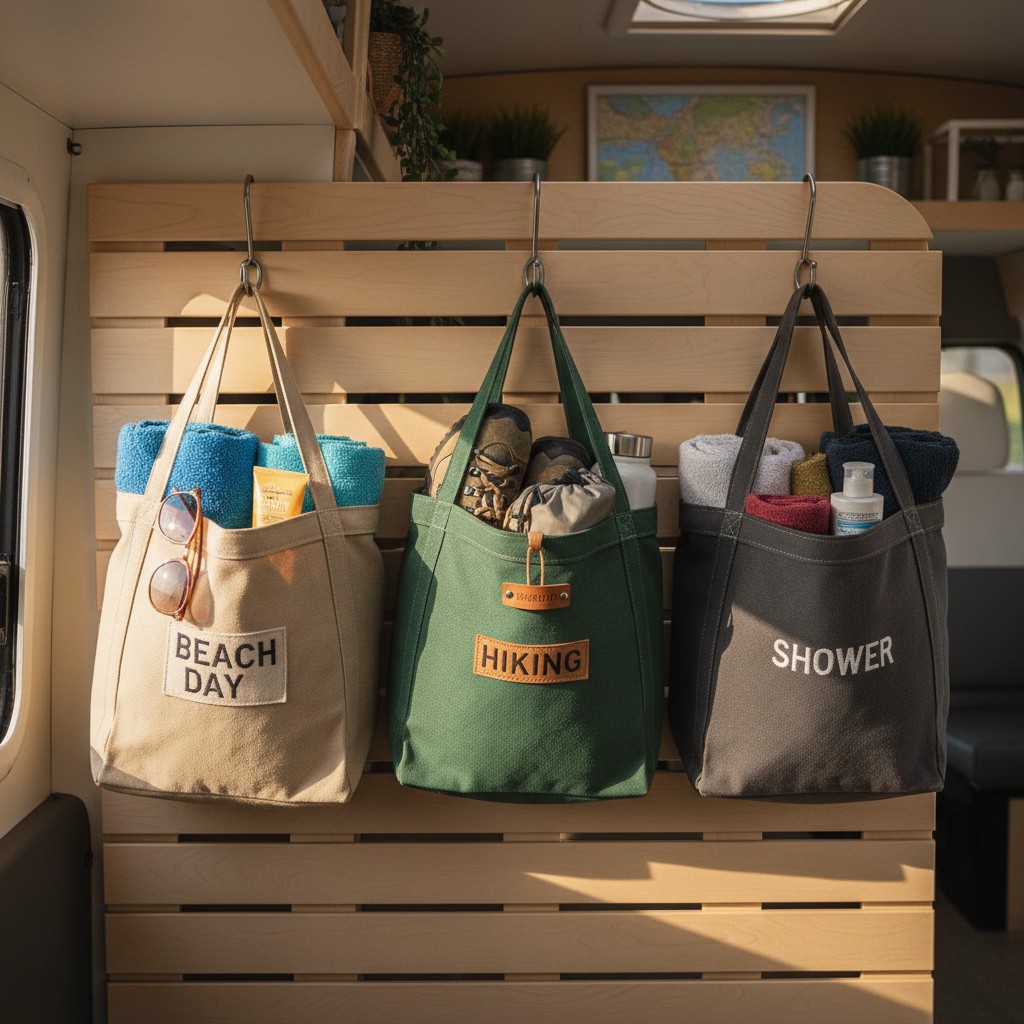
Constantly packing and unpacking for different activities is a major source of camper clutter and frustration. A 'Go-Bag' system streamlines this process entirely. The idea is to have several pre-packed bags dedicated to specific, recurring activities. When it's time for that activity, you just grab the bag and go, knowing everything you need is already inside.
Identify your most common outings. For most van lifers, this might include a 'Shower Bag' (with toiletries, a quick-dry towel, and flip-flops for campsite facilities), a 'Hiking Bag' (with a water bottle, snacks, sunscreen, and a small first-aid kit), and a 'Beach Bag' (with a towel, sunscreen, and a book). Use simple canvas totes, drawstring bags, or small backpacks for this purpose.
After each use, make it a habit to immediately restock any consumed items. Refill the snack supply in the hiking bag, replace the travel-sized shampoo in the shower bag. This discipline is key to the system's success. Storing these bags on hooks near the door or in a designated cabinet makes them easy to grab on your way out, saving you the 15-minute frenzy of searching for your sunscreen and flip-flops, and keeping the rest of your van undisturbed.
14. Use the Backs of Cabinet Doors
In the quest for storage space, don't overlook the backs of your cabinet doors. This flat, protected surface is a prime location for organizing small, flat, or lightweight items that would otherwise get lost in the cabinet itself. With a few simple and cheap additions, you can turn this dead space into a highly functional storage zone.
There are many ways to utilize this space. You can mount small plastic or wire baskets to hold spice packets, sponges, or cleaning supplies. Specialized clips designed to hold spice jars can be adhered to the inside of a pantry door. You can also mount holders for rolls of aluminum foil, plastic wrap, or paper towels. For a communication hub, affix a small, thin corkboard or a magnetic whiteboard for notes, shopping lists, or receipts.
Before you start drilling or sticking, make sure to measure the clearance. Place the items you want to hang on the door and close it slowly to ensure they don't interfere with the shelves or contents inside the cabinet. This simple hack is a perfect example of maximizing every available inch, a core principle of efficient mobile living.
15. File Your Clothes Vertically
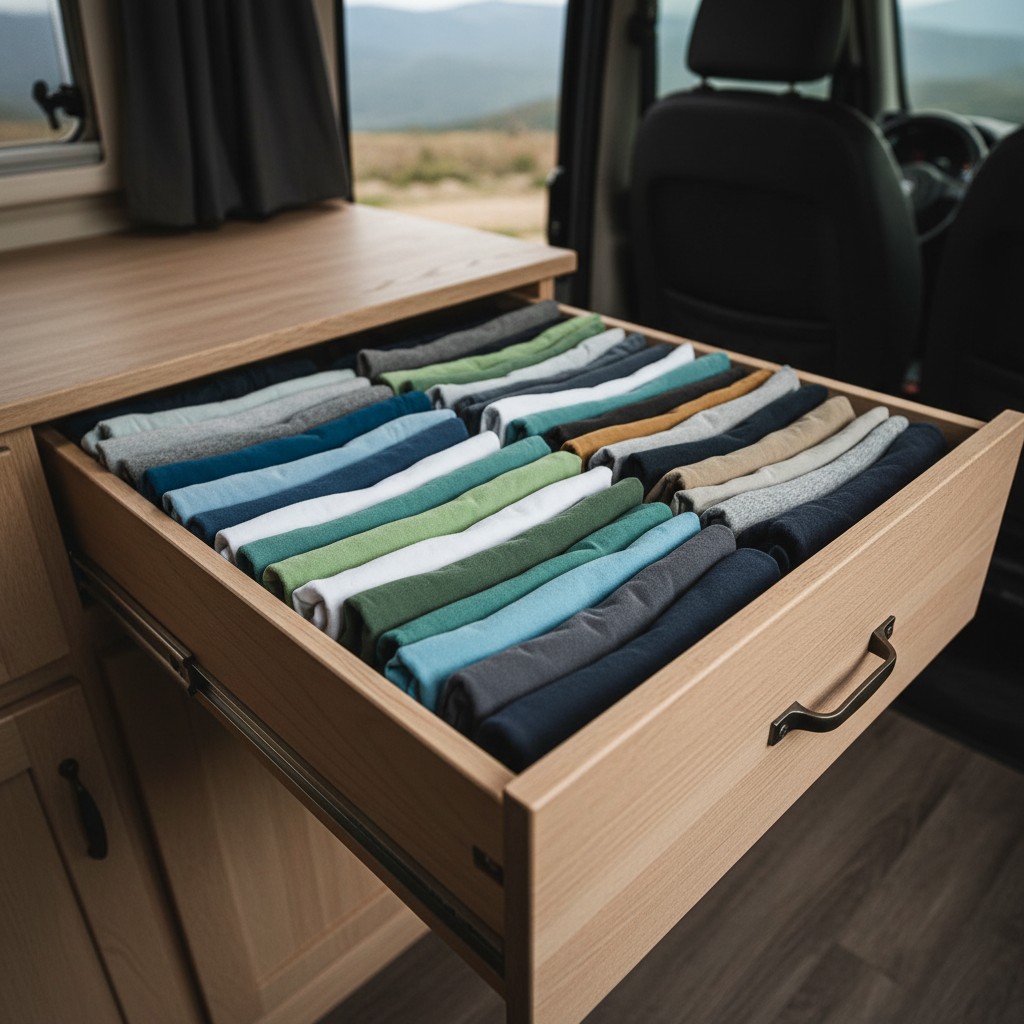
Stacking clothes in a deep camper drawer or bin is a recipe for chaos. To get the shirt at the bottom, you have to disrupt the entire pile, leading to a wrinkled mess. The solution, popularized by organization expert Marie Kondo, is to 'file' your clothes. This means folding them into small, stable rectangles and arranging them vertically in the drawer, like files in a filing cabinet.
To do this, lay a shirt flat, fold the sides in to make a long rectangle, and then fold that rectangle into thirds. The goal is to create a small packet that can stand up on its own. Arrange these packets from front to back in your drawer. The result is transformative. You can now see every single item of clothing at a glance, without having to dig. Simply pluck out the one you want without disturbing the others.
This method works for almost everything—t-shirts, pants, shorts, underwear, and socks. It not only keeps your drawers perpetually neat but also maximizes space, as you can fit more items in when they are tightly and uniformly folded. Organizing your small camper closet this way is a matter of precision and smart choices, much like curating a capsule wardrobe or perfecting your Fashion and beauty routine for travel.
16. Build a Custom 'Between the Seats' Console
The space between the driver and passenger seats is often awkward and underused. While you can buy generic plastic consoles, building a simple custom one from scrap plywood is a cheap and far more effective solution. This allows you to create a unit that perfectly fits the space and is tailored to your specific needs, keeping all your driving essentials organized and within arm's reach.
Measure the space carefully and design a simple, narrow box. You can add features like cutouts on top to serve as cup holders, a thin slot to hold your phone upright, and a small cubby for sunglasses, pens, and a notepad. You might also include a hinged lid to create a hidden compartment for more valuable items or to simply keep clutter out of sight.
This project requires minimal woodworking skills and can be built with a few pieces of wood, some screws, and wood glue. You can paint it to match your van's interior or cover it with fabric or vinyl for a more professional finish. A custom console prevents items from sliding onto the floor while driving and turns a wasted space into one of the most functional zones in your cab.
17. Use Fruit Hammocks for Produce
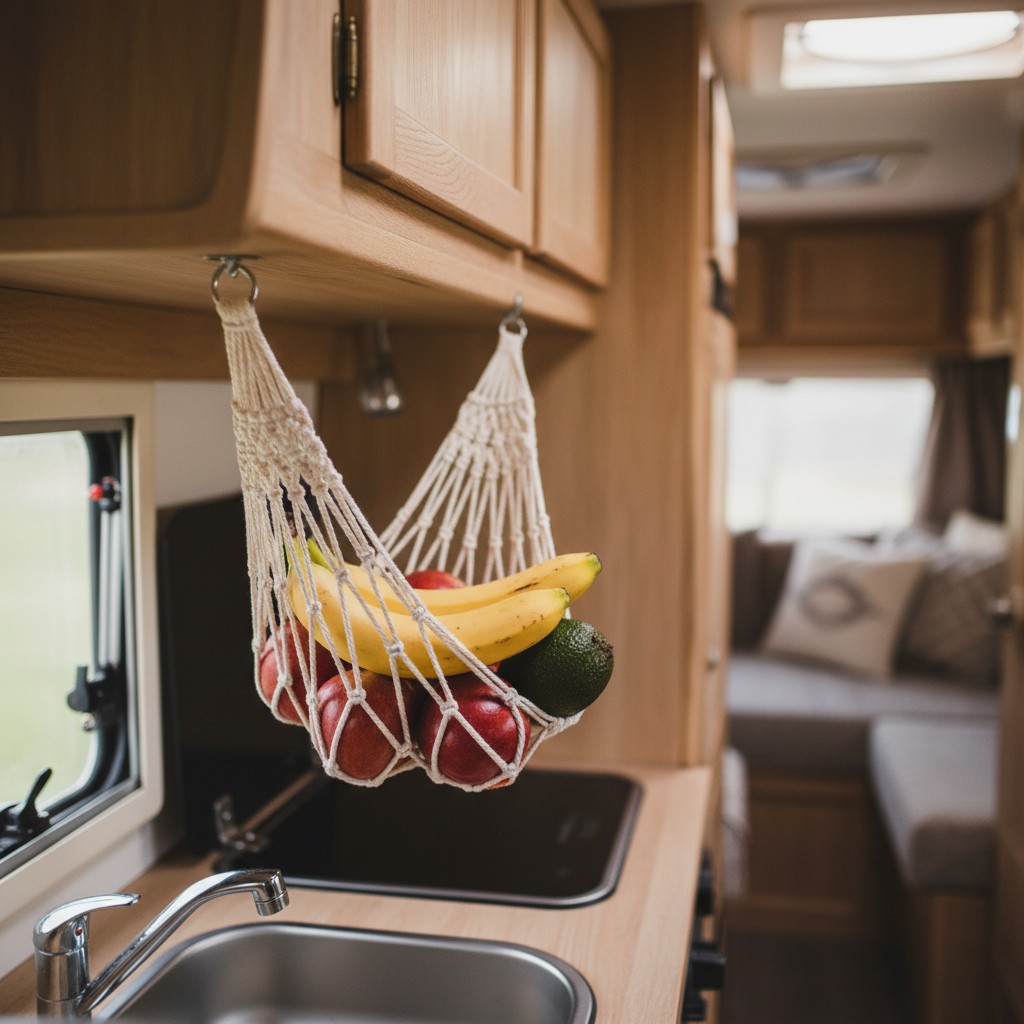
Counter space in a camper kitchen is extremely limited, and a traditional fruit bowl is a bulky space-waster. Furthermore, produce like bananas, avocados, and peaches can easily get bruised and battered when stored in a bin or drawer during travel. A fruit hammock is the perfect, low-cost solution to both problems. These small, net-like hammocks are typically made of macrame or mesh and hang under your upper cabinets.
By suspending your produce, the hammock allows for air circulation, which helps fruit and vegetables stay fresh longer. The gentle cradling motion also prevents the bruising that occurs from rolling around in a drawer. It keeps your delicate produce safe while freeing up valuable counter or fridge space for meal prep.
You can buy these hammocks online for a low price, or if you're crafty, you can easily make one yourself with some string. Installation is as simple as screwing two cup hooks into the underside of your cabinet and looping the hammock onto them. It's a charming, bohemian touch that is also intensely practical for life on the road.
18. Implement Under-Bench Slide-Out Trays
The space under benches and dinette seats is a huge storage area, but it's often a deep, dark abyss where items go to be forgotten. Accessing anything at the back requires you to pull everything else out first. A brilliant way to solve this is by building simple, low-profile slide-out trays on wheels. This brings the contents of the storage area out to you, making everything easily accessible.
Measure the height, width, and depth of your under-bench compartment. Build a shallow box or tray out of thin plywood that is slightly smaller than these dimensions. Attach four small caster wheels to the bottom of the tray. Now you have a rolling drawer that you can load up with shoes, canned goods, or tools.
This DIY project dramatically improves the functionality of your largest storage spaces. You can build multiple trays for one compartment to categorize your items. While it requires a bit of construction, the payoff in convenience is enormous. No more kneeling on the floor and blindly digging into a dark hole; just a smooth, simple pull is all it takes to access your gear.
Frequently Asked Questions
What is the absolute cheapest way to add storage to a camper?
The cheapest method is to repurpose what you already have or can get for free. Use sturdy cardboard boxes to create drawer dividers. Ask grocery stores for old wooden crates to use as shelves. Use old jars for dry food storage. For securing items, bungee cords are incredibly cheap and effective. The key is to look at every item and surface with a creative eye for its secondary storage potential.
How do I stop all my stuff from falling and rattling while I'm driving?
There are several key strategies. First, use tension rods inside cabinets and the fridge to act as barriers. Second, line shelves and drawers with non-slip liner. Third, use bungee cords or webbing to hold items against walls or inside cabinets. Fourth, for metal items like knives and tools, magnetic strips are the best solution as they hold things firmly in place. Finally, pack things tightly; empty space is what allows items to gain momentum and shift.
What are the most important areas to organize first in a new camper?
Start with the three areas you use most frequently: the kitchen, the sleeping area, and the cab. In the kitchen, focus on securing food and cooking tools so meal prep is easy. In the sleeping area, organize your clothes and personal items to create a calm, restful environment. In the cab, organize maps, electronics, and personal items you need to access while driving. Getting these core zones under control will have the biggest impact on your day-to-day comfort.
How can I add storage without drilling holes in my camper's walls?
There are many excellent no-drill solutions. Command hooks and strips are your best friends; they can hold a surprising amount of weight and remove cleanly. Tension rods are perfect for creating dividers and hanging rails inside existing spaces like closets and cabinets. Over-the-door organizers require no installation. You can also use freestanding modular units like stacked crates that are secured to each other but not to the van itself.
What is the most common organization mistake people make in a camper?
The most common mistake is failing to utilize vertical space. People tend to fill up drawers, benches, and floor space first, which creates clutter at eye-level and makes the space feel smaller. The second biggest mistake is using bulky, round containers that waste space. Successful camper organization is about thinking vertically—using walls, doors, and ceilings—and choosing square or rectangular containers that fit together without gaps.
Image Source: © MrDetechtive — all photos in this article are the exclusive property of MrDetechtive and may not be reproduced or reused without written permission.