16 Ageless Eye Makeup Tips for Older Women
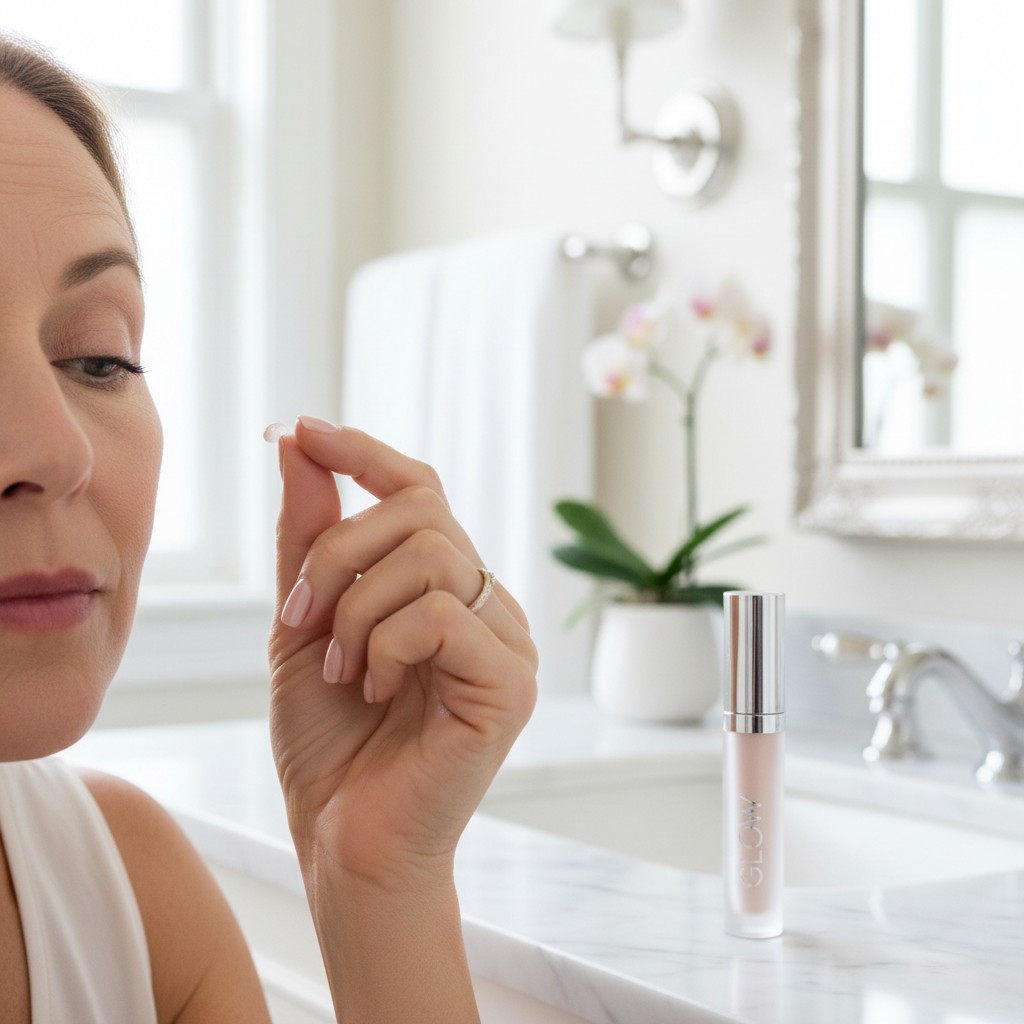
Embracing the beauty that comes with age doesn't mean abandoning your makeup bag; it means evolving your techniques to celebrate your features with elegance and confidence. The art of eye makeup for older women isn't about chasing youth but about enhancing wisdom, character, and the timeless beauty you already possess. The skin around our eyes changes, becoming more delicate and often developing fine lines or hooded lids, but with the right approach, your eyes can look more defined, bright, and expressive than ever before.
This guide moves beyond outdated rules and focuses on modern, effective strategies that work with your skin, not against it. We'll explore how simple shifts in product choice and application can make a world of difference, turning common challenges like creasing eyeshadow or smudging liner into things of the past. Just as lifestyle trends adapt to our modern world, our beauty routines should also adapt to celebrate our changing features gracefully. It’s about feeling polished, powerful, and perfectly you at any age.
From the foundational step of priming to the finishing touch of a perfectly shaped brow, we've compiled 16 expert tips to demystify eye makeup for mature skin. Get ready to rediscover the joy of makeup and learn techniques that will leave you feeling radiant and sophisticated, proving that true style is indeed ageless.
1. Start with a Hydrating Eye Primer
The single most transformative step in any mature makeup routine is the application of a quality eye primer. As we age, eyelids can become thinner, more textured, or develop fine lines, making it difficult for eyeshadow to apply smoothly and stay put. A primer acts as a crucial barrier between your skin and your makeup, creating a silky, uniform surface that prevents eyeshadow from settling into creases and fading throughout the day.
To apply, take a tiny, grain-of-rice-sized amount on your ring finger, which has the gentlest touch. Pat it gently across the entire eyelid, from the lash line up to the brow bone. Don't forget the inner and outer corners of the eye. Allow it to set for about a minute before applying any other products. This simple step not only grips onto pigment for vibrant, all-day color but also helps to subtly blur texture for a more youthful appearance.
Look for primers with hydrating or nourishing ingredients like hyaluronic acid or vitamin E. These formulas won't just improve makeup longevity; they'll also provide a dose of moisture to the delicate eye area, preventing the dry, cakey look that some silicone-heavy primers can cause. A good primer is a non-negotiable investment for a flawless finish.
2. Choose Matte Eyeshadows Over Shimmer
While shimmering and glittery eyeshadows can be fun, they are notorious for accentuating what you'd rather soften. The light-reflecting particles in shimmery formulas can catch on and magnify the appearance of fine lines, wrinkles, and crepey texture on the eyelids. Matte eyeshadows, on the other hand, absorb light, which allows them to create depth and definition in a much more flattering and sophisticated way.
A well-chosen matte palette is your best friend. Use a light matte shade as a base across the entire lid to even out skin tone. Apply a medium-toned matte shade into the crease to create the illusion of depth—this is especially effective for hooded eyes. This technique recedes the area, making the eye appear more open and defined without any distracting sparkle.
This doesn't mean you have to banish all luminosity. A satin-finish shadow, which has a very subtle, soft sheen rather than overt glitter, can be a beautiful compromise. Apply a touch of a light satin shade just to the center of the mobile lid or the inner corner to add a hint of brightness without emphasizing texture. The key is strategic placement and avoiding high-frost formulas.
3. Opt for Neutral and Warm Tones
Color choice is paramount when it comes to creating a timeless and elegant eye look. Harsh, dark, or overly bright colors can look severe and actually make the eyes appear smaller. Instead, gravitate towards a palette of soft neutrals and warm tones. Shades like taupe, rosy beige, soft plum, warm browns, and muted peaches are universally flattering and bring a gentle warmth and brightness to the face.
These colors are brilliant for creating natural-looking contours. A soft brown swept into the crease adds definition that looks organic, not theatrical. A wash of peach or rose across the lid can counteract sallowness and brighten the entire eye area. These shades are also incredibly versatile, easily transitioning from a simple daytime look to a more defined evening style by simply building up the intensity.
To find your most flattering shades, consider your eye color. For blue eyes, warm browns and terracotta shades provide a beautiful contrast. Green eyes pop against soft plums and mauves. Brown eyes are incredibly versatile and look stunning with nearly any neutral, from rich espresso to warm gold-toned beiges. The goal is to enhance, not overpower.
4. Master the Art of Tightlining
A thick, harsh line of eyeliner on the upper lid can close off the eye and look dated. Enter tightlining—a makeup artist's secret for defining the eyes in the most natural way possible. This technique involves applying eyeliner to the upper waterline, the strip of skin just beneath your upper lashes. The effect is subtle yet powerful, creating the illusion of a thicker, darker lash line from the root.
To tightline, gently lift your upper eyelid with one hand to expose the waterline. Using a soft, waterproof pencil eyeliner, carefully trace along this line, wiggling the pencil between the roots of your lashes. This deposits color right at the base of the lashes, filling in any gaps. It's a game-changer for making eyes look more awake and defined without taking up precious lid space, which is especially important for those with hooded or smaller eyes.
Choose a waterproof gel or kohl pencil in a dark brown or soft charcoal shade. Pure black can sometimes be too harsh for mature eyes. Ensure your pencil is sharpened to a soft point to avoid poking your eye. This technique requires a steady hand at first, but with a little practice, it becomes a quick and indispensable part of your routine for beautifully defined eyes.
5. Use a Soft, Smudged Eyeliner
Liquid eyeliner, with its sharp precision, can be unforgiving on skin that isn't perfectly smooth. It can skip over textured areas and create a severe line that magnifies any imperfections. A much more flattering alternative for mature eyes is a soft kohl or gel pencil eyeliner. This type of liner allows for a softer, more blended application that adds definition without the harshness.
After applying your pencil liner as close to the upper lash line as possible, take a small smudger brush or even a cotton swab and gently smudge the line. This softens the edge, creating a subtle, smoky effect that is incredibly chic and forgiving. It helps to meld the liner with your eyeshadow and lashes, creating a cohesive and beautifully blended look that makes the eyes appear larger and more sultry.
For the color, consider swapping your go-to black for a rich chocolate brown, a deep plum, or a smoky grey. These colors provide ample definition but are softer and more harmonious with a mature complexion. The smudged effect is also fantastic for camouflaging any wobbles in your application, making it a foolproof technique for a polished look every time.
6. Always Curl Your Eyelashes
As we age, our lashes can become straighter and sometimes more sparse, which can contribute to the eyes looking tired or smaller. An eyelash curler is an essential tool that provides an instant, dramatic lift. By curling your lashes upwards, you open up the entire eye area, making your eyes appear wider, brighter, and more awake. It's one of the quickest and most effective anti-aging makeup tricks in the book.
To get the perfect curl, ensure your lashes are clean and free of any mascara. Place the curler at the base of your upper lashes, getting as close to the root as you can without pinching the skin. Gently squeeze and hold for about five seconds. Then, move the curler to the middle of the lashes and squeeze again, and finally, repeat at the tips. This 'pumping' motion creates a natural, graceful curve rather than a sharp, 90-degree angle.
Invest in a quality eyelash curler with soft, rounded silicone pads that won't crimp or damage your delicate lashes. Remember to clean the pads regularly to remove any residue and replace them every few months to ensure they remain effective and hygienic. This simple step, performed before mascara, maximizes the impact of your mascara and gives your eyes a youthful, vibrant look.
7. Select a Defining Mascara
The right mascara is the finishing touch that ties the entire eye look together. For mature eyes, the goal is definition and lift rather than heavy, clumpy volume that can weigh down the lashes. Look for mascaras labeled as 'lengthening,' 'defining,' or 'curling.' These formulas tend to be lighter and are designed to separate and coat each lash individually for a clean, elegant finish.
Focus your application on the upper lashes. Wiggle the wand at the base of the lashes to build volume at the root, then sweep the wand upwards to the tips. Applying one or two thin coats is usually sufficient to add definition without clumping. Applying mascara to the lower lashes can sometimes cast a shadow, emphasizing dark circles, and is more prone to smudging. If you do apply it to the bottom, use a very light hand and only apply to the roots.
Consider a mascara in a soft black or brown-black shade for a less intense look, which can be more flattering for daytime. Waterproof formulas are also an excellent choice, as they are less likely to smudge or flake onto the under-eye area, especially if you experience watery eyes. A well-applied mascara draws the eye upward, providing a final lift that brightens your whole face.
8. Don't Neglect Your Brows
Eyebrows are the unsung heroes of the face. They provide structure, frame the eyes, and can give the entire face a more lifted and youthful appearance. With age, brows can become sparse, lighter in color, or lose their arch. Taking a minute to fill them in and define their shape is a crucial step that brings balance and polish to your overall look.
The key to natural-looking brows is to use a soft hand and choose the right product. An eyebrow pencil with a fine tip is excellent for creating hair-like strokes to fill in sparse areas. A brow powder applied with an angled brush provides a softer, more diffused look. Choose a color that is one shade lighter than your natural hair color (or matches your lowlights) to avoid a harsh, artificial appearance. Focus on filling gaps and extending the tail of the brow, which tends to shorten with age.
Start by brushing your brow hairs upward with a spoolie brush to see their natural shape and identify any sparse spots. Fill in where needed, then brush through again to blend the product for a seamless finish. A clear or tinted brow gel can then be used to set the hairs in place all day. Well-groomed brows complete your eye makeup and have a remarkable effect on your entire look.
9. Apply Concealer Strategically
Dark circles and discoloration under the eyes can be a concern at any age. While it's tempting to apply a thick layer of concealer, this often backfires on mature skin, caking and settling into fine lines to accentuate them. The modern approach is strategic placement, using a lightweight, hydrating concealer only where you need it most.
Instead of swiping a large triangle under the eye, focus the product on the darkest areas. Typically, this is the inner corner of the eye near the nose and sometimes a shadow on the outer corner. Apply a small dot of liquid concealer in these specific spots. Then, use your ring finger or a damp makeup sponge to gently tap and blend the product, pressing it into the skin rather than dragging it.
Choose a concealer that is hydrating and luminous, as matte formulas can look dry. Select a shade that is one-half to one full shade lighter than your foundation and has a peachy or yellow undertone to color-correct the blue or purple tones of dark circles. By using less product and placing it correctly, you can achieve a bright, refreshed look that appears completely natural.
10. Use a Light Hand: Less is More
The golden rule for mature makeup application is that less is almost always more. Heavy layers of foundation, powder, and eyeshadow can easily settle into lines and look mask-like. A light, delicate touch, on the other hand, results in a fresh, modern, and sophisticated finish that enhances your natural beauty. The goal is to look polished and put-together, not heavily 'made up'.
This principle applies to every step. Use a single pump of foundation, a tiny dot of concealer, and a light dusting of powder. When it comes to eye makeup, build up your eyeshadow in thin, sheer layers rather than packing on a dark color all at once. This gives you more control and results in a beautifully blended, professional-looking application that avoids a heavy, crepey appearance on the lids.
Embrace the idea of targeted application. You don't need to cover your entire face in product. Use concealer just for dark circles or blemishes. Apply blush just to the apples of your cheeks. For eyes, a simple wash of a neutral shadow, a soft line of smudged liner, and a coat of mascara can be far more impactful and flattering than a complex, multi-colored look. The elegance is in the simplicity.
11. Highlight the Brow Bone and Inner Corner
A strategic touch of light can do wonders to lift and brighten the eye area. Highlighting the brow bone and the inner corner of the eye are two classic techniques that create an instant illusion of lift and awakeness. This simple step helps to define the shape of your brow and makes your eyes appear larger and more luminous.
For the brow bone, choose a matte or satin-finish eyeshadow that is one or two shades lighter than your skin tone—avoid anything with glitter. A creamy vanilla or soft bone color works perfectly. Using a small, flat brush, apply a small amount just underneath the arch of your eyebrow and blend it downwards. This creates a subtle highlight that defines the arch and makes the brow look more lifted.
For the inner corner, you can use the same matte shade or a soft, shimmery champagne for a little extra pop. Use a pencil brush or your pinky finger to place a tiny dot of highlighter right at the inner corner, where the upper and lower lids meet. This instantly brightens the eyes and makes you look more alert and refreshed. It’s a small detail with a huge impact.
12. Blend, Blend, and Blend Some More
If there is one skill that separates amateur makeup from a professional-looking application, it's blending. Harsh lines of eyeshadow or liner can look severe and dated, drawing attention to texture. The goal is to create a soft, seamless transition between colors and from the eyeshadow to your skin, resulting in a diffused, watercolor-like effect that is incredibly flattering.
Invest in a good quality, fluffy blending brush. After applying your crease color, use this clean brush to make small, circular motions and windshield-wiper motions back and forth along the crease. This will soften the edges of the shadow and diffuse the color, creating a beautiful gradient. Blending takes time and patience, but the polished result is well worth the effort.
This rule applies to all products around the eye. Blend the edge of your eyeliner with a smudger brush. Blend your concealer with a tapping motion until it melts into your skin. Blend the highlight on your brow bone so there are no obvious lines. A well-blended look appears more natural and sophisticated, ensuring your makeup enhances your features beautifully.
13. Consider a Cream Eyeshadow
For those with particularly dry or crepey eyelids, powder eyeshadows can sometimes emphasize texture. Cream eyeshadows can be a fantastic alternative. Their emollient formula glides over the skin more easily and can have a plumping, smoothing effect. They often provide a luminous, satin finish that imparts a youthful glow without the chunky glitter of other formulas.
Cream shadows are incredibly user-friendly. Many come in stick or pot form and can be applied directly to the lid and blended out with just a finger. This makes them perfect for a quick and easy everyday look. A single wash of a bronze, taupe, or champagne cream shadow across the lid provides instant polish and brightness with minimal effort.
To ensure they last, it's still wise to use an eye primer underneath. You can also set a cream shadow with a light dusting of a coordinating powder shadow or a translucent setting powder. This helps to lock it in place and prevent creasing, combining the smooth application of a cream with the longevity of a powder for the best of both worlds.
14. Adapt Your Technique for Hooded Eyes
Hooded eyes, where a fold of skin from the brow bone partially or fully covers the mobile eyelid, are very common, especially with age. Standard eyeshadow application can get lost under the hood, so a few strategic adjustments are necessary to create visible definition. The key is to create a new, higher crease.
With your eyes open and looking straight into the mirror, identify where the hood folds over your lid. Your new 'crease' will be the area just above this fold. Take a medium-toned matte eyeshadow on a small, tapered brush and apply it along this new crease line, following the curve of your eye socket. This creates the illusion of depth where it would otherwise be hidden.
Keep the mobile lid (the part that is visible below the hood) light and bright with a soft, satin or matte shade. This will bring that area forward and make the eye appear more open. Also, ensure your eyeliner is very thin and your mascara is well-curled to maximize visible lid space. By working with your eye shape, you can create a beautifully defined and open look.
15. Invest in High-Quality Brushes
You can have the best makeup in the world, but without the right tools, you won't get the best results. Investing in a small set of high-quality makeup brushes is crucial for achieving a flawless, blended finish, especially on mature skin. Good brushes pick up and deposit pigment more evenly and are softer and gentler on the delicate eye area.
You don't need a huge collection. A few key brushes will cover all your needs for eye makeup. An essential kit would include: a flat shader brush (for packing color onto the lid), a fluffy blending brush (for diffusing color in the crease), a small pencil brush (for detailed work like smudging liner or highlighting the inner corner), and an angled brush (for brows or liner).
Look for brushes with soft, synthetic bristles, as they are durable, easy to clean, and work well with both cream and powder products. Remember to wash your brushes regularly (at least once a week) with a gentle soap or brush cleaner to prevent bacteria buildup and ensure they perform at their best. Good tools are an investment that pays off in every application.
16. Set Your Makeup for Longevity
After you've perfected your eye makeup, the final step is to ensure it lasts all day. A makeup setting spray is a fine mist that creates an invisible film over your makeup, locking it in place. This is particularly beneficial for mature skin, as it helps prevent products from migrating into fine lines or fading away.
Hold the setting spray bottle about 8-10 inches from your face, close your eyes, and mist your face lightly in an 'X' and 'T' formation. This ensures even coverage. Allow it to air dry completely. The spray will help to meld all the layers of makeup together, giving your skin a more natural, less powdery finish.
Look for setting sprays with hydrating or radiant finishes. These formulas not only provide longevity but also give the skin a healthy, dewy glow, counteracting any potential dryness from powders. This final step is the secret to keeping your beautifully applied eye makeup looking fresh and vibrant from morning until night.
Frequently Asked Questions
How can I stop my eyeliner from smudging on my upper eyelid or hood?
This is a common issue, especially with hooded eyes. The best solution is a three-step process. First, always start with an eye primer to create a non-oily base. Second, after applying your pencil eyeliner, go over the line with a matte eyeshadow of the same color (e.g., a dark brown shadow over a brown pencil) using a small, angled brush. This 'sets' the pencil. Finally, use a waterproof mascara, as non-waterproof formulas can sometimes transfer onto the lid.
What eyeshadow colors should women over 60 avoid?
While there are no hard rules in makeup, some colors are less flattering on mature skin. It's generally best to avoid heavily frosted or glittery eyeshadows as they can highlight texture and fine lines. Very dark, harsh colors like matte black or navy applied all over can make the eyes look smaller and severe. Instead, opt for soft mattes and satins in neutral and warm tones like taupe, soft brown, peach, and muted plum, which are far more forgiving and brightening.
Is liquid eyeliner a bad idea for older women?
Not necessarily, but it requires more skill to apply on textured skin. Sharp, liquid lines can look harsh and can skip or feather on crepey eyelids. If you love the look, try a modern felt-tip pen liner, which offers more control. However, a much more forgiving and often more flattering option is to use a soft kohl or gel pencil and smudge it slightly. This creates a softer, smoky definition that is chic and doesn't demand perfect precision.
How do I apply makeup to cover crow's feet?
The key is to hydrate the area first with a good eye cream. Then, use makeup sparingly. Avoid packing on heavy concealer or foundation, as it will only settle into the lines and make them more obvious. Instead, focus on drawing attention away from the area. Brighten the under-eye area with a lightweight concealer (avoiding the outer corner), curl your lashes, and define your eyes. A polished brow and a bright lip color will also draw attention elsewhere, minimizing the focus on the crow's feet.
Should I wear mascara on my lower lashes?
This is a personal preference, but for many mature women, skipping mascara on the lower lashes is more flattering. Applying mascara there can draw attention downwards, potentially emphasizing dark circles or fine lines. It's also more prone to smudging throughout the day. If you feel your eyes look incomplete without it, use a very light hand. Barely touch the wand to the roots of the lower lashes, or use a brown mascara for a softer effect.
Image Source: © MrDetechtive — all photos in this article are the exclusive property of MrDetechtive and may not be reproduced or reused without written permission.